Reusable Sandwich Bag
I hate the idea of using wasteful plastic baggies everyday for lunches so I decided to make my own reusable sandwich bag! I did not want any plastic involved in these bags so I decided to use unbleached muslin as the basis.
At first my husband had some concerns about using these bags:
Question: “Um, won’t it get all gross since it’s not plastic?”
Answer: “Nope. There are lots of things that can go in these bags that are not liquid based - sandwiches, chips, carrots, etc. And they are washable. If the bag gets a little mayo on it, just throw it in the wash.”
Question: “It’s a breathable fabric. Isn’t the bread going to get stale.”
Answer: “Yikes, I hadn’t thought about that. Let’s try it out and see what happens.”
Well, we tested the bag and it worked great. The reusable bag was kept inside of his larger lunch bag and the sandwich stayed nice and fresh.

I made this bag a generous size so that we could get a nice sized, full flavor sandwich into it. I plan on making smaller versions for snack packs.
Tutorial:
Small piece of sturdy, unbleached muslin (approximately “8 x 16.5”)
Orange thread
White thread
Orange & green embroidery floss
7" strip of ¾" wide sew-on velcro
Embroidery needle
Sewing machine
Directions:
Cut 2 rectangles from the muslin - (1) 8" x 7 ½" & (1) 8" x 9".
Press both pieces.
Take the smaller rectangle and zig-zag stitch (or serge) one end with white thread.
Next, take that same edge and fold over (towards the wrong side) to create a ½" hem.
Press and stitch to hem with white thread.
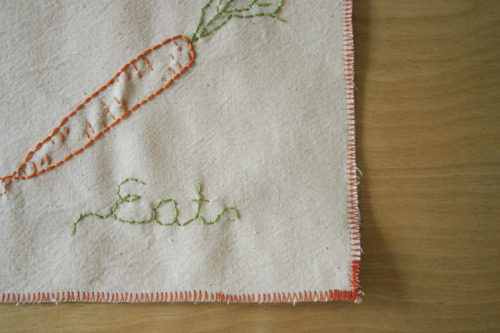
Take this rectangular piece and sketch a design on the right side of the fabric with pencil or removable marking pen. The hemmed edge will be the top side.
Hand embroider the design. For the carrot design I used 3 strands of floss to outline the carrot and 2 strands for the detail work inside the carrot, along with the roots and stems. To create a continuous line I used a back stitch.
Once the embroidery is complete, lay the 2 pieces of muslin, wrong side together, aligning the bottom edge. The hemmed edge is the top edge.
Align the velcro so that the 2 pieces will lock together once the top flap has been folded over. Mark, pin, and sew velcro to both pieces of fabric with white thread. The velcro should fit on the right side of the embroidered piece and the wrong side of the back piece.
Now, align the two pieces wrong side together, once again, and pin.
Top stitch using a zig-zag stitch around all 4 sides with the orange thread.
Voila! You are Done!
20 Notes/ Hide
calypsoscraftworks reblogged this from spoonandthimble-blog-blog
constantwanderlust-blog liked this
spoonandthimble-blog-blog posted this
