In june of this year you could read here my article about “My first experiences with 360 degree panorama photography”. I have done a lot of 360 degree photography since then and gained a lot of experience. I’m sharing you my experience and my vision about the best way to start with this specific type of photography that takes quite some time to learn. It is not necessarily the way other people would advise, but if you follow this, I’m very sure you safe a lot of time!
Necessary hardware
If you want to make good and professional 360 degree panorama photos you need:
- A solid tripod with a hook to hang your camera bag on.
- A panoramic head for your tripod like the Nodal Ninja.
- A nadir adapter if you want to take the tripod out of the end result.
- A camera with a fisheye lens.
- A cable release
Number one is pretty clear. The hook for your bag will give the tripod more stability and will keep your tripod in place, no matter what surface your tripod is standing on, when you start to turn your camera with the Nodal Ninja. Number two is also clear. The Nodal ninja is pretty solid, but in the long run I think I will replace it with the panoramic tools of Really Right Stuff. Those are 3 times as expensive as the Nodal Ninja, but more solid and less vulnerable to windy conditions.
Number three the nadir adapter is a small hinge like piece that you mount on your Nodal Ninja. This lets the Nodal Ninja pivot and shoot straight down your downshot. Number four camera with fisheye lens. I strongly advise to buy a fisheye lens for your 360 degree photography. Yes you can do it with a wide angle lens, but with a fisheye it takes less shots to shoot your panorama. This is important! If you shoot on a day were clouds are passing by the sun, you need to be fast to shoot your complete panorama. I bought the 15 mm fisheye lens of Sigma. It’s a full frame lens. With this lens I’m able to shoot a full 360 degree panorama with 180 degrees vertical in just 8 photos. Usually I shoot a 5 stops bracket to cover the full tone scale of the scene. Add 3 more different downshots. This makes it easier to take the tripod out the end result and for most panorama’s I end up with 55 images. Number five the cable release prevents you from touching the the camera and causing camera shake.
Software
Earlier I proclaimed that I used the software of PTGui to stitch the images that I shot, into a panorama. I choose the software because it was advised on a lot of websites and it seemed as the best choice in the market. After a while I came to the conclusion that this software package is not as good as other people say it is. THAT IS MY PERSONAL OPINION! I think the user interface seems from ages ago and isn’t user friendly at all. The application is slow and devours all the resources of your computer. It caused a serious error on my RAID system. So I asked my money back, which they did. When I had bought PTGui already a colleague photographer attended me at the software of Kolor.com . Kolor is a Swiss company that is fully focused on everything 360 degree, including video. I have chosen their Autopano Giga software to stitch my panorama’s. This program is very user friendly, has a much shorter learning curve to get good results from then PTGui, it stitches faster, straightening of for example buildings works better and easier and it has a workflow (which PTGui totally lacks). You can choose standard settings for your rendering and the program will make them the standard. In PTGui you have to choose that for each and every panorama again and again. It are these little thing that get really annoying if you work a lot with a program! Yes Autopano is 50 euro’s more expensive, but trust me it’s peanuts! It’s so much more fun to work with!
For creating 360 tours I choose the Panotour software of Kolor.com. It has a lot of features and it meets my requirements for now. Probably most clients chose to upload the panorama photo as a Photo sphere to Google View. Google will translate your panorama photo into a 360 degree sphere.
I’ve found and excellent website “The guide to panoramic photography” by Arnaud Frich. He shares all the information about panoramaic photography you can ask for!
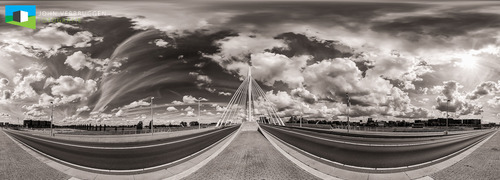
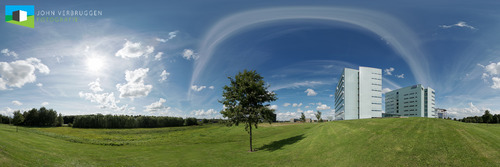
Results
If you want see some results of the above choice of tools, look at the 360 degree panorama photography page of my website. For the interactive tours take a look at The 360 degree interactive tours page of my website. For the way How to handle the above hardware to create an awesome panorama read the “How to find your nodal point and shoot your 360 degree panorama” part of the article about My first experiences with 360 degree panorama photography in june!
regards
John
PS. Please SHARE this article with your followers, by reblogging it or go to my blog and share it via the social media buttons under this article on my blog.
reimiller-photo liked this
nurnielfa liked this
thliii liked this
johnverbruggenfotografie posted this