DIY Camping Chair
As the weather warms, I’m less and less inclined to eat meals inside. In fact, I want to do everything I possibly can outside! This inevitably means that we’ll be entertaining outside more, and no one wants to sit on a raggedy, ripped-up uncomfortable patio chair.
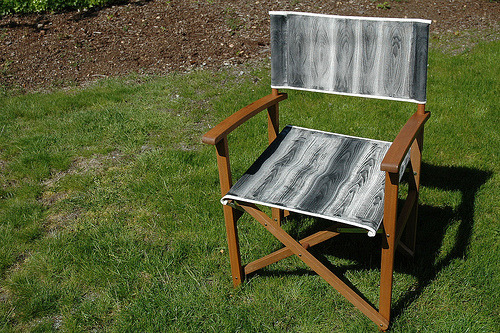
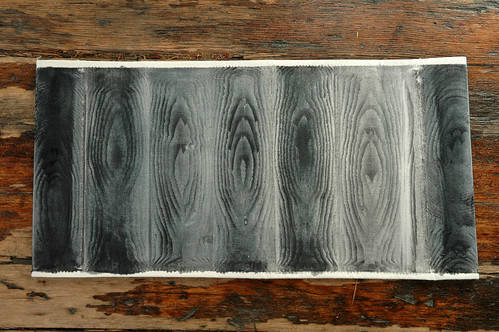
These canvas fold-out chairs are inexpensive, classic, and easy to set up and stow away … and they are, literally, blank canvasses for design. Here’s a faux bois finish I did recently, and not only did it turn out but it was also super easy.
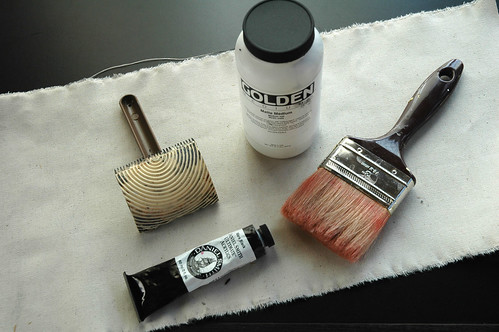
Tools you’ll need:

2. Wood Grainer Tool – This can be found at most paint stores; I bought mine at local Seattle paint store Dalys for about $5.00
3. Gold Matte Medium – This general purpose, easily pourable medium is useful for extending colors, decreasing gloss and increasing film integrity; basically, it’s a magic in a jar. It works great as a base or primer; a fantastic replacement for gesso, indeed. You can typically find it in art supply stores.
4. Acrylic Paint – I mixed this with my matte medium, which lightened the paint’s color for that distressed finish I was going for.
5. Paint Brush – A medium to large brush will probably be the most convenient for this project. I used an interior paint brush, but your typical “artist’s brush” will be sufficient as well.
The process…
1. Tape down your canvas. This will keep it in place and give you a nice, clean border to work with.
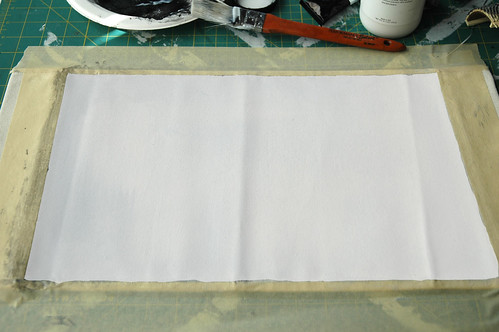
2. Brush the canvas with a coat of your Matte Medium and allow to dry for 20-30 minutes; you now have a sturdy surface for your faux bois!
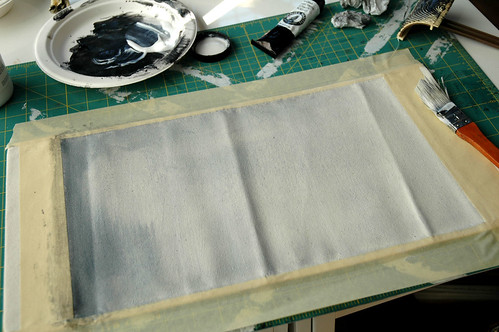
3. Once the first coat is dry, mix your acrylic color with some Matte Medium in a plate or tray. Going along the left edge, brush on a coat of the colored mixture about the width of your grainer tool. Then, drag the grainer from top to bottom of the colored streak, rocking the tool back and forth to create the wood grain effect. If you’re unhappy with your “grain”, no frets! Just brush over it with your paint brush and try again! Repeat the process until you’ve covered your panel in lovely wood-grained panels.
NOTE: If you feel your paint mixture is too thick, feel free to add a bit of water to dilute it; also, it definitely helps to practice on art canvas to get a feel for how the material interacts with the paints and materials.
4. Un-tape and let dry on a flat surface for 20-30 minutes.
5. Once dry, assemble chair as told in the chair’s instructions. Sit back, relax in one of your new chairs and admire how beautiful the other one looks!
