Building a Neighborhood Part Two: The Color Palette
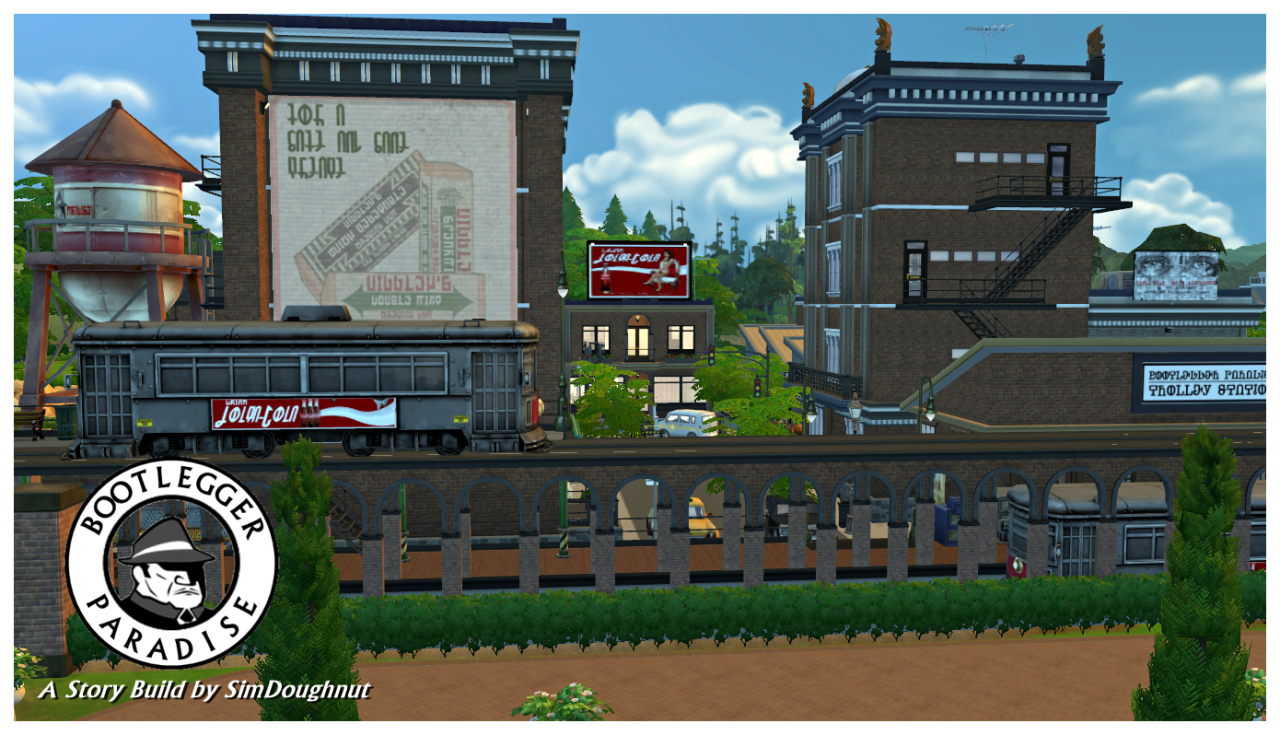
As you can see, we’ve gone from the little boxes I talked about in part one, to giving those boxes some definition, to selecting our color palette. We’ve also gone from the original four buildings on main street to seven.
When I use the phrase “color palette” in regards to TS4 build mode, I don’t just mean in the traditional sense of color swatches you’d paint a wall with. I am referring to all the brushes available. From the color of the paint, to the bricks, to the flooring, to the various trims, and landscaping you use to flesh out a room or building. You never want to use one brush to paint an entire room or building, that would be boring.
When it comes to building a neighborhood you especially want to avoid doing this so your neighborhood doesn’t become dull, drab and boring. You want your neighborhood to have as much flavor and character as the Sims you create to live in it. When creating a neighborhood, build mode becomes your CAS. The architecture is the family so it should have the same “genetic” sequence as the family members you create in CAS, but they shouldn’t all be wearing the exact same outfit. We’re building a a neighborhood here, not designing a baseball uniform. Does that make sense?
For instance; I am a huge fan of brick, wood and stone, had I elected to paint all four of these buildings the same way, the neighborhood would look boring. By the same token, I don’t want them to look so radically different that it doesn’t appear like a cohesive neighborhood. So how do you do that?
Well I do it by choosing a limited color palette. Something where I have enough color variations of the same “brush” that I can apply them over the course of several buildings and/or rooms, without it becoming completely homogenous. As you can see I also repeat several textures on several buildings to keep the desired aesthetic or “genetics” continuous. That’s really about all there is to it.
At this point the buildings are all empty, and I’ll go back and start adding rooms, and shops and exterior decorations like hanging plants, lampposts, benches, landscaping etc. Where you go from here really becomes a matter of personal taste. Just remember to use a limited set of “brushes” on the exterior decorations so your buildings will continue to have that same “genetic” make up across the neighborhood to keep it cohesive. When it comes to the inside, you do whatever you want. It has no affect on how a neighborhood looks, so feel free to go crazy. In fact, I encourage you do do so. That is how you truly personalize something and make it yours.
In the past I’ve always released my builds after they are fully decorated, but I’ve decided to do something different this go round. Rather than have you have to hunt down and download a ton of CC, I’ve gone ahead and uploaded all four of these facades in this neighborhood to my JoeDoughnut gallery. You can find them all by using the hashtags #downtown #frenchquarter #redneckchic or #JoeDoughnut
Although all four facades were constructed almost completely with base game assets you will have to turn on “include custom content” to see them because I did use some custom window stickers made for me by budgie2budgie as well as dominationkid’s vending machine for the BBQ Rib shack in facade 3. I also used kiwisims4’s antique flooring across all four facades. Obviously you don’t need this CC to make use of the spaces for your own purposes, but I did use them in mine.
I really hope you enjoyed this short little look into the processes that go on when I create a build, and that you’ll make use of these facades. If you do please be sure to send me some screen shots. I’d really love to see them.
Have fun :)!